DIY Wall Art to Personalize Your Space

Have you ever stared at a blank wall and thought, “This space could use a little personality”? I’ve been there too. When I first moved into my home, the bare walls felt more like a blank canvas than a cozy space. One weekend, armed with a cup of coffee and a burst of creativity, I decided to try my hand at DIY wall art. Let me tell you—it completely transformed my space! Today, I’m sharing some of my favorite DIY wall art ideas to help you personalize your space without breaking the bank. Whether you’re an experienced crafter or just dabbling, these projects are easy, fun, and totally doable.
What You Might Need
Before we dive into the projects, here are some basic materials you might need:
- Canvas or sturdy cardstock
- Acrylic paints or watercolors
- Painter’s tape
- Scissors
- Brushes, sponges, or palette knives
- Picture frames or hanging clips
- Hot glue gun
- Craft paper or fabric scraps
- Mod Podge or spray adhesive
Feel free to adjust these materials based on the specific project you’re tackling!
1. Abstract Painted Canvas: A Pop of Color

Let’s Set the Scene
Imagine this: A large blank canvas that’s begging for a splash of personality. Abstract art is all about expression, and the best part? There’s no such thing as “getting it wrong.” Whether you love bold, bright colors or soft, muted tones, this project is perfect for adding a pop of color to your space.
How to Create It:
- Prepare Your Canvas: Lay your canvas flat on a protected surface and prime it with white gesso (optional for better paint adherence).
- Choose Your Colors: Select 3-5 colors that complement your room. Think of your favorite throw pillows, rugs, or decor items for inspiration.
- Start Layering: Use brushes, sponges, or even your hands to layer the paint. Create bold streaks, swirls, or splatters—whatever feels right to you.
- Add Texture: Experiment with a palette knife to add dimension or layer lighter colors for highlights.
- Seal and Display: Let the canvas dry completely, then hang it using picture hooks or prop it against a wall for a more casual look.
Picture This:
A bold, oversized canvas leaning against a neutral wall, its vibrant strokes of turquoise, coral, and gold catching the sunlight. The words “DIY wall art” practically dance off the frame, making your room feel like a chic art gallery.
2. Gallery Wall Using Printables and Mixed Media
Let’s Set the Scene
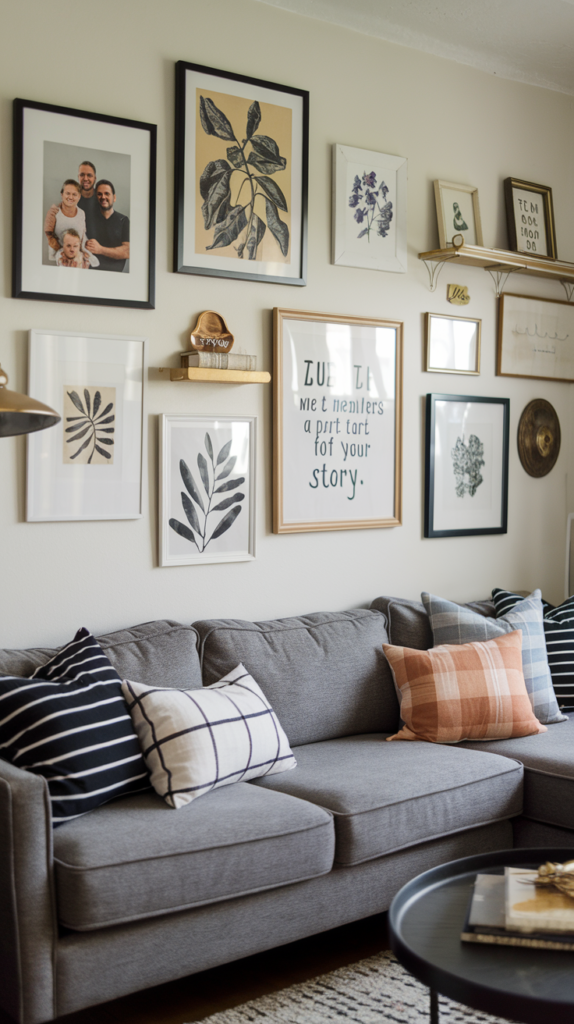
Picture walking into a room and immediately being drawn to a stunning gallery wall that tells a story. This project is perfect if you love mixing personal photos, printables, and unique textures to create something one-of-a-kind.
How to Create It:
- Plan Your Layout: Lay your frames or pieces on the floor first to experiment with arrangements.
- Pick Your Art: Download free printables online, use family photos, or create your own minimalist sketches.
- Mix Materials: Add a twist by framing pressed flowers, fabric swatches, or handwritten notes.
- Frame It Up: Use a mix of frame styles and sizes for variety.
- Hang with Precision: Use a ruler, level, and painter’s tape to ensure perfect placement on the wall.
Picture This:
A cozy living room wall filled with memories—family portraits in sleek black frames, vintage-inspired botanical prints, and a heartfelt handwritten quote, all tied together with DIY charm. Each piece of DIY wall art tells a part of your story.
3. DIY Fabric Wall Hanging
Let’s Set the Scene
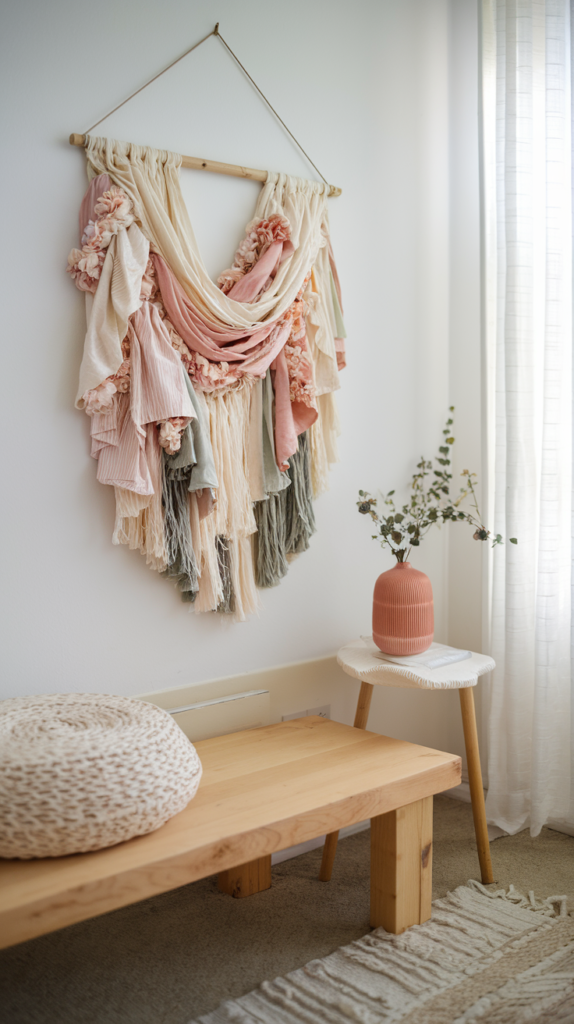
For a touch of boho elegance, why not try a fabric wall hanging? This is a great project for using up leftover fabric scraps or turning an old scarf into a piece of art. It’s simple, unique, and adds texture to your space.
How to Create It:
- Select Your Fabric: Choose fabrics in colors and patterns that match your room’s aesthetic.
- Cut and Arrange: Cut the fabric into strips, triangles, or any shape you like.
- Assemble: Tie or glue the pieces onto a wooden dowel or a branch for a natural look.
- Hang It Up: Use a piece of twine or ribbon to hang the dowel on a wall hook.
Picture This:
A dreamy fabric wall hanging in shades of cream, blush, and soft gray sways gently by the breeze from an open window. The textures and hues bring warmth and movement to your space, creating DIY wall art that’s uniquely you.
4. Typography Art with a Personal Touch

Let’s Set the Scene
Sometimes, the simplest message can make the biggest impact. Typography art lets you express yourself with quotes, phrases, or even your favorite song lyrics. It’s minimalist, modern, and endlessly customizable.
How to Create It:
- Choose a Phrase: Pick something meaningful, like a motivational quote or a lyric that resonates with you.
- Design Your Text: Use free design tools like Canva to create your typography. Play with fonts, colors, and layouts.
- Print and Frame: Print your design on high-quality cardstock and frame it in a sleek or vintage frame.
- Optional Embellishments: Add a pop of glitter, dried flowers, or hand-painted accents for extra flair.
Picture This:
A framed quote that reads, “Be Your Own Kind of Beautiful,” hanging above a small desk. The clean lines of the typography stand out against the soft cream walls, making your DIY wall art an inspiring centerpiece.
Closing Thoughts
Personalizing your space with DIY wall art is such a rewarding experience. Not only does it add warmth and character to your home, but it also reflects your unique style and creativity. Remember, it doesn’t have to be perfect to be beautiful—the joy is in the process. So grab your supplies, set aside an afternoon, and let your imagination run wild. I can’t wait to see what you create!